Create a simple image gallery in Drupal 6 using CCK and Views
This tutorial will guide you through how to create a simple gallery within Drupal 6 using CCK, Views and a few more custom modules.
This tutorial was written with the following versions of Drupal and modules:
- Drupal 6.10
- CCK (Content Construction Kit) 6.x-2.1 (6.x-2.2)
- Views 6.x-2.3 (6.x-2.5)
- Filefield 6.x-3.0-beta1 (6.x-3.0-rc1)
- Imagefield 6.x-3.0-beta1 (6.x-3.0-rc1)
- ImageAPI 6.x-1.5 (6.x-1.6)
- Imagecache 6.x-2.0-beta8 (6.x-2.0-beta9)
- Lightbox2 6.x-1.9
Update: Modules have been updated to the latest versions as of 20 April 2009, version numbers are in brackets after the links above.
Installation
Install Drupal as you normally would and extract each of the modules to the /sites/all/modules directory. You should have a directory structure like the following:
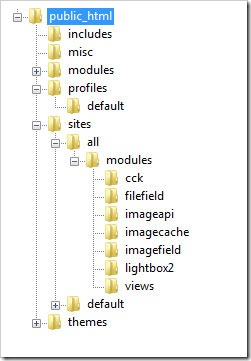
When logged in go to /admin/build/modules and enable the following modules:
- Content
- Filefield
- Imagefield
- ImageAPI
- ImageAPI GD2 (unless your server is configured for Imagemagick, then enable the ImageMagick module instead)
- ImageCache
- ImageCache UI
- Lightbox
- Views
- Views UI
Once you have ticked the modules, press Save configuration.
Imagecache
We need to create 2 presets for our images, one will be a thumbnail to show in the gallery and a second to show within the lightbox.
Navigate to /admin/build/imagecache and click Add new preset.
Set the preset Namespace to thumbnail. Click Add Scale and Crop, set the width to 180 and the height to 120.
Then create a new imagecache preset with the name lightbox. This time select Add Scale and set the width to 800 and the height to 600.
CCK Imagefield
First we will set up a new content type for our images which we will call Image. Navigate to /admin/content/types and click Add content type.
Set the name to Image and the type to image. You may enter a description if you wish.
Under Submission form settings, delete the text from the Body field.
Depending on how you want to set up the gallery, you can change the Workflow settings so that images aren’t automatically added but are added to an approval list, for this tutorial we will make all images published, so untick Promoted to frontpage and leave Published ticked.
Under Comment settings, set comments to disabled.
Save the content type.
Next to the Image content type click manage fields. In the Add New field area, set the label to Image and the field name to image (to make it field_image), for the Type of data to store, select File then for Form element select Image. Press Save.
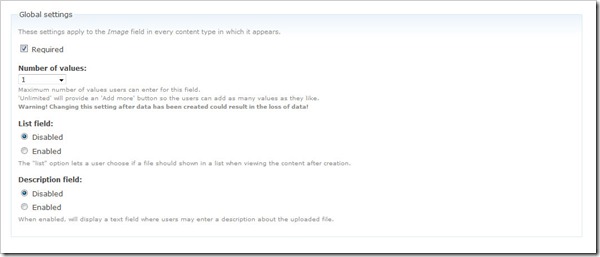
Under Global settings, tick the Required box and set the Number of values to 1. Leave the List field and Description field to Disabled.
Then press the Save field settings button.
Now click the Display fields tab at the top of the page.
Set the Label to Hidden and set both the Teaser and Full node to Lightbox2: thumbnail->lightbox.
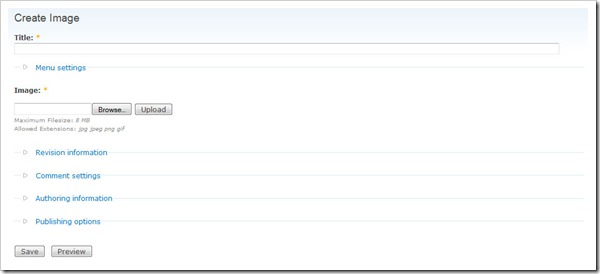
Now under /node/add/image we can add an image to go in to our gallery.
For now create 3 or 4 images.
Under /admin/content/node you should now have some nodes.
Now we will set up a view to display these nodes in a gallery.
Views
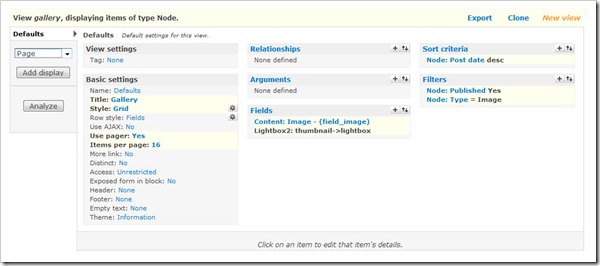
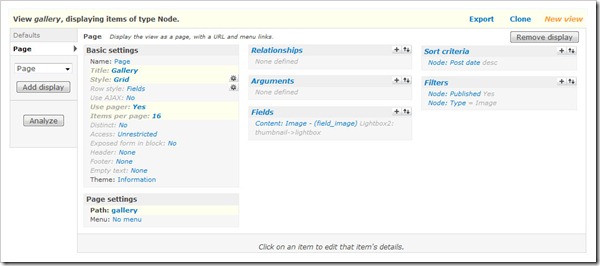
Navigate to /admin/build/views and click the Add tab at the top of the page. Set the view name to something like gallery. Leave View type set to Node.
Set the title to Gallery. For Style set to Grid then chose 4 columns and set Alignment to Horizontal.
For Use pager set to Full pager. Then for Items per page, set to a multiple of 4, I am going to use 16 to give us a 4x4 grid of images. If you wish, you can set Use AJAX to Yes to stop the whole page being loaded on the pager.
Add the following Filters:
- Node: Published = On
- Node: Type = Image
Under Fields select Content: Image (field_image). Set Label to None and change Format to Lightbox2: thumbnail->lightbox.
Under Sort criteria you can set this to what you want. I am going to set them to newest first. Select Node: Post date and set to Descending.
On the left select Page from the drop down and click Add display.
Under Path set to gallery.
Press Save.
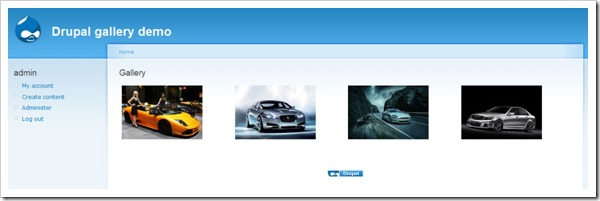
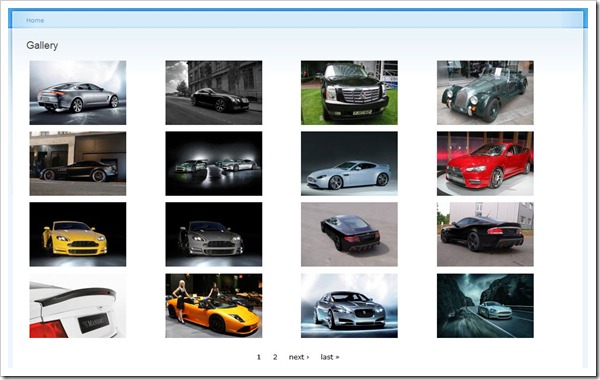
Now if you navigate to /gallery you can see your gallery in action.
Once you upload more than 16 images which we set our Items per page to, a pager will appear.
Update: There may be cases where the image isn't uploaded to the image type when a user submits the node add form without uploading the image. This will show up as an empty section within the gallery and the node will be submitted with no image, but Imagefield will not tell the user that this is a problem even if it is a required field.
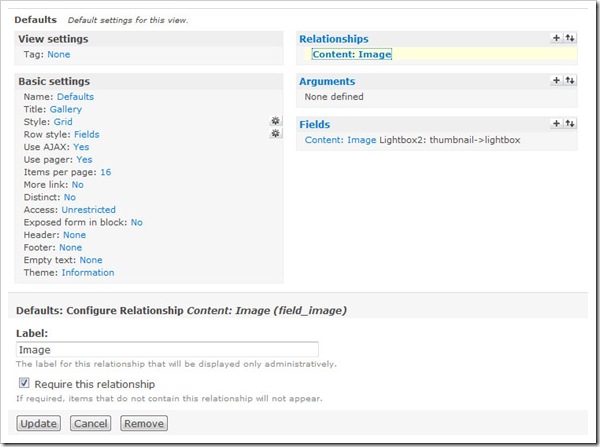
To stop these empty image types showing in the gallery, you will need to add a relationship for the image and set it to a required relationship. This way the image node will not appear in the gallery unless there is an image attached. You could then set up an additional view to find out which image nodes don't have an image attached.




Comments
Anonymous
Mon, 2011-04-25 05:28
Permalink
gallery not showing
Hi,
Thanks for the tutorial.
I set up the gallery following all the steps and I can see it when I'm logged in as admin, but it doesn't show up in public view, only the pagination appears. I must have something set as not published, but I can't see it.
I appreciate your help on this.
Regards,
Anna
james
Mon, 2011-04-25 18:35
Permalink
Make sure anonymous users can
Make sure anonymous users can see the imagecache images under the Permissions page.
Anonymous
Fri, 2011-05-13 22:01
Permalink
It's great for newbees like me, But?????????
How do i use multiple image fields instead of one?
How do i make a good slide show out of the gallery?
what do i do to have every register user with his own separate gallery and slide show?
please help me out : my email is mikeizev@yahoo.co.uk,
thanks once more for the tutorial.
james
Sat, 2011-05-14 11:44
Permalink
For users to get their own
For users to get their own gallery read this follow up tutorial.
For multiple image fields (I assume you mean upload more than one image at a time) use Image FUpload.
james
Thu, 2011-05-26 22:35
Permalink
Updated for Drupal 7
Tutorial on creating a gallery in D7 using fields and Views.
Anonymous
Thu, 2011-06-02 17:16
Permalink
Images are not displaying to anonymous users
Hi
I have done all steps as per your tutorial but the anonynmous users can't see the uploading the images & administrator can see the images what is the problem
I have given all permissions
james
Sat, 2011-06-04 08:32
Permalink
There is obviously a
There is obviously a permissions problem somewhere.
Make sure that the necessary imagecache presets are checked on your permissions page for anonymous and authenticated users. Do you have any CCK access modules enabled? If so you will need to give access for anonymous users to see the imagefield.
Anonymous
Thu, 2011-06-09 19:26
Permalink
A Few Questions
Firstly, thank you for a simple follow through tutorial compared to the many others.
Everything is working however I have a few questions.
When you click on the image you have "View Image Details", how do you remove this?
Also is there a way to make albums for these photos? For example I have a set of photos of me in Greece and another of me in Italy and I wanted to make an album for each to be displayed on the same page.
And finally how do I add the Gallery to the primary links?
Again many thanks!
james
Thu, 2011-06-09 21:51
Permalink
Only users with the correct
Only users with the correct permissions will see the "View images details" link.
As for your second question, read the Create an album based image gallery in Drupal 6 using CCK and Views
Anonymous
Sat, 2011-06-11 01:52
Permalink
Thanks
Which module do I edit the permission?
Thanks for the link.
james
Sat, 2011-06-11 07:39
Permalink
Anonymous users won't see it
Anonymous users won't see it (I don't think). It will be under Lightbox2 permissions.
I have stopped using Lightbox2 as I think Colorbox is a better module all round and looks nicer as well as a working Drupal 7 release.
Anonymous
Fri, 2011-06-24 04:57
Permalink
It not shows the images
Hi..Dear Friend I am doing same thing what you gave in this link but it doesnot shows any images after navigate the gallery.I corrrectly follow everything what you told.I set in the view relationship also.Please any body help me.
Thanks,
Shashikala BR
james
Fri, 2011-06-24 17:02
Permalink
Check clean URLs are
Anonymous
Sat, 2011-10-15 07:47
Permalink
Regarding the Image Gallery
after one day frustration i have found this tutorial very nicely done.
Thanks
Eric
Wed, 2012-02-22 18:27
Permalink
Many thanks for your support
Without one code line... and works fine!
Eric, french Drupal beginner
Marvin
Fri, 2012-03-23 18:55
Permalink
Very Nice
Helped a lot............thanku
ramu
Wed, 2012-04-25 05:00
Permalink
I am unable to see Thumbnails of uploaded images
First I would like to thank author for an wonderful tutorial. I followed all the steps. At the end in gallery page I am unable to see thumbnail view of images. I am getting links , if i click on link then i can see the images. please help in this regard to get thumbnail view.
Thanks in Advance
james
Wed, 2012-04-25 10:19
Permalink
Make sure your imagecache
Make sure your imagecache directory is writable.
Some people have found that on their hosting, it only works with private file system.
foxy57
Mon, 2012-05-07 00:16
Permalink
Gallery
Hello James Tombs,
I finaly found a good tutorial about inserting a gallery, thanx for that. I am a complete newbie about Drupal, and I agree with some other people that Drupal is a complex system with a lot of modules. I have spend a lot of hours and sleep to manage how things work.
My question is: How do I put the gallery in a node with a link to a, by myself made menu, or to the navigation menu. For example: Home, Contact, Gallery.
Greetings from The Netherlands.
james
Mon, 2012-05-07 10:14
Permalink
Go to Site Building > Menus
Go to Site Building > Menus and add the link to your Primary links menu to your gallery node.
sivaprakaash
Wed, 2013-01-16 10:15
Permalink
thanks for this tutorial in
thanks for this tutorial in views.
Mitali
Fri, 2013-03-22 07:25
Permalink
Thanks, Very nice tutorial !!
Nice tutorial !!!
Moch. Imron
Sat, 2013-06-15 00:54
Permalink
CCK Imagefield
Mr. James Tombs ... why when I come to Display fields and Set the Label to Hidden and set both the Teaser and Full node.... I can't find Lightbox2: thumbnail->lightbox .... but I just see :
Generic Files
Path to file
lightbox image
lightbox image linked to modul
lightbox image linked to image
lightbox file path
lightbox URL
Thumbnail image linked to node
Thumbnail image linked to image
Thumbnail file path
Thumbnail
Image linked to node
Image linked tofile
Link Image
Link Image - Just Link
Lightbox Link Image
Thumbnail Link Image
.... in the Teaser and Full Node. Which one I must choose it for Teaser and Full node....
Thank you for your help....
james
Sat, 2013-06-15 12:39
Permalink
Sounds like you haven't
Sounds like you haven't installed the Lightbox module.
Pages